
Worn-out tubs often still work perfectly well long after they’ve lost their luster. Chips, scratches, stains, and dullness can all leave the fixture looking less than its best. Professional refinishing isn’t an option for every tub, but painting will work for most finishes. Ceramic or porcelain can be particularly tricky to paint, but it’s feasible with the proper preparation and materials. The new finish will look good and should last for a few years with regular use and careful cleaning.
How to Paint a Porcelaine Bathtub or Sink
1. Choose the Right Paint

Not all paints will bond tightly enough to the porcelain surface to stay attached through washing and cleaning cycles, mainly because the material is non-porous. Epoxy-based paints designed specifically for the shower, tile, and tub use are all you should try.
They’re available primarily in white and beige shades, but some brands also stock more colorful tints so you can get creative in the bathroom. Don’t be tempted to experiment with acrylic or oil paints in a tub. Even if you rarely or never use the tub, it’s likely to look less than ideal and even peel just from sitting empty unless the right materials are used.
2. Prepare the Surface
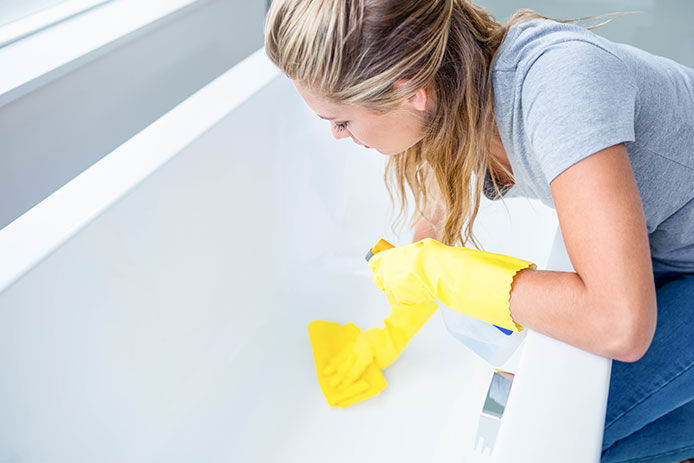
Even epoxy-based paints will struggle to bond to the smooth and non-porous porcelain surface unless it is perfectly clean. Start with basic scrubbing that you’d use any other day to remove dirt and debris.
Once the tub’s surface is free from general grease and dirt, use a large sponge and trisodium phosphate to wipe down the surface again. Wear gloves for this step and eye protection. The TSP strips away residual oils, soap scum, grease, and other residues that can interfere with the bonding of the bond. It will evaporate and leave the surface clean and ready to paint.
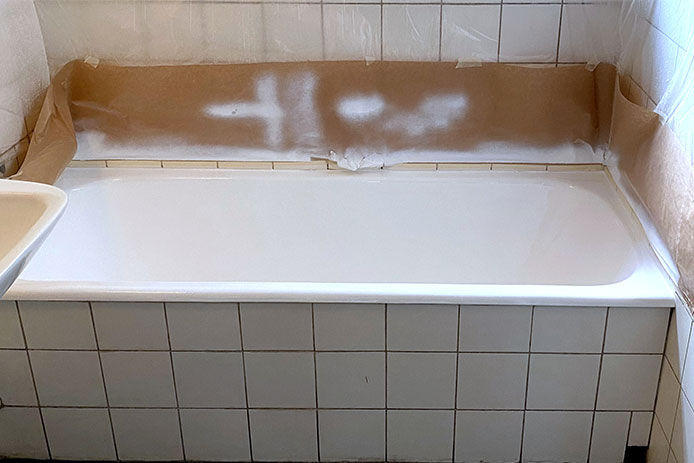
Remove the fixtures and scrape out the old caulk around the edges. Then it’s time to sand the surface. You’re aiming to completely roughen the surface until it’s no longer smooth anywhere to the touch. Then wipe the surface with slightly damp rags to remove any lingering dust. Finally, mask off surrounding areas with painter’s plastic and tape.
3. Apply the Paint
Epoxy-based paints produce powerful vapors, so open the windows and use fans to create good ventilation without directly blowing air over the tub or paint. Two-part epoxy mixtures bond better, but they’re harder to mix and produce more fumes. One-part mixtures can be shaken or stirred and then applied directly. Make sure to mix as long as the manufacturer recommends and in any way they require to ensure good blending.
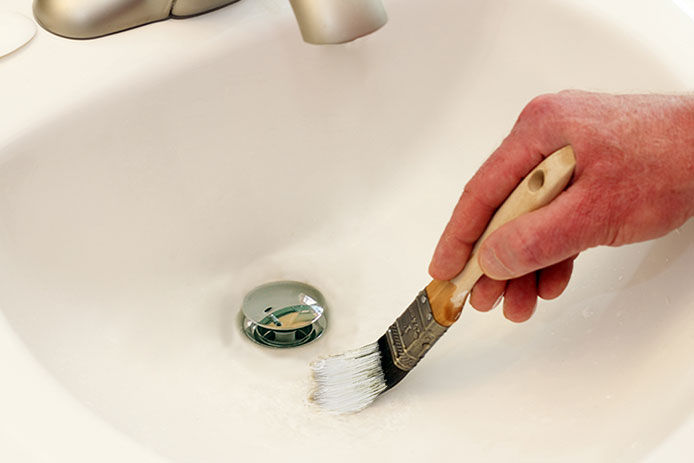
Paint the porcelain tub or sink much like you would paint a wall. Apply a thin but even coat with a standard brush that you can throw away when you’re done. Smooth any drips immediately. A roller can also work, but use a smaller one for more control. Brush marks should settle out on their own. Apply a thin first coat, then apply a slightly thicker second coat after the first dries as long as the manufacturer recommends.
4. Wait for Use
Two coats should give a smooth and complete coating. Unless the instructions recommend it, avoid additional coats since they’re more likely to peel up. After painting, let the tub cure at the conditions recommended by the manufacturer. For best results, this may mean using a dehumidifier in the room to maintain the right humidity level or adjusting the heat or cooling in your home.
Wait longer than the recommended curing time for long soaks in the tub. Brief showers should be fine at the listed wait time, but a leisurely soak exposes the paint to more heat and moisture. Stick to limited use for the first few weeks, at least to give the paint time to bond as much as possible. Sinks can be used as soon as the manufacturer recommends, but don’t fill them with hot water and leave them standing.
5. Clean With Care
Avoid using any solvents, abrasives, or even scrubbing brushes when cleaning the painted tub or sink. Any spray-on cleaners and a soft sponge should work well enough for routine cleaning. Don’t pour boiling water in the tub if you used to do so for clog management in the drain since it can make the paint weaken or peel.
Mistakes to Avoid When Repainting
When repainting a porcelain bathtub or sink, avoiding these common mistakes can ensure a smooth, professional finish that lasts:
- Skipping the Sanding: Sanding the surface is critical for paint adhesion. If the surface isn’t roughened, the paint may peel or chip off quickly. Take your time to sand every inch thoroughly, ensuring the finish has something to grip onto.
- Applying Paint Too Thick: Thick coats of paint may seem like a time-saver, but they can lead to uneven drying, bubbling, or peeling. Always apply thin, even layers, allowing each coat to dry as per the instructions before applying the next.
- Rushing the Curing Process: The curing process ensures the paint fully bonds to the surface. Using the tub or sink too soon can weaken the bond, causing the paint to peel or crack. Be patient and wait longer than recommended for soaking in a tub.
- Using the Wrong Type of Paint: Not all paints are suitable for porcelain or ceramic surfaces. Using acrylic or oil-based paints will result in a poor finish and quick peeling. Always choose epoxy-based paints specifically designed for tubs and sinks.
Maintenance Tips: Ensuring Your Repainted Tub or Sink Lasts
To make your repainted porcelain tub or sink last as long as possible, proper maintenance is important. Follow these tips to keep the surface looking its best:
- Routine Cleaning: Clean the tub or sink regularly with non-abrasive cleaners and a soft sponge or cloth. Avoid using scouring pads or brushes that can scratch the surface, as stated above.
- Avoid Harsh Chemicals: Steer clear of bleach or ammonia-based products that can degrade the epoxy finish over time. Opt for mild, pH-balanced cleaners to preserve the paint’s integrity.
- Prevent Heat Damage: Again, don’t pour boiling water into the tub or sink. The intense heat can weaken the paint bond, causing it to peel or crack. If you need to clear a clog, use warm water instead or a chemical drain cleaner.
- Prompt Repairs: Address chips or scratches as soon as they appear by touching them up with leftover paint or repair kits. This prevents the damage from spreading.
- Use Non-Slip Mats Carefully: If you use a non-slip mat, ensure it’s designed for painted surfaces. Rubber-backed mats can stick to the paint and peel it away when removed.
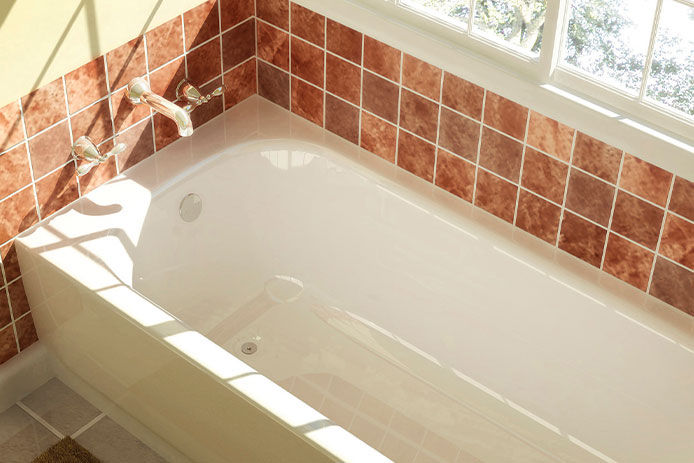
A painted tub can look great for anywhere from 2 to 5 years, depending on the quality of paint you choose. That can give you enough time to save up for a replacement or to decide how to remodel the bathroom. Don’t be afraid to handle your own DIY bathtub painting project if you have at least some experience in sanding and prepping for painting in general.
While do-it-yourself projects can be fun and fulfilling, there is always a potential for personal injury or property damage. We strongly suggest that any project beyond your abilities be left to licensed professionals such as electricians, plumbers, and carpenters. Any action you take upon the information on this website is strictly at your own risk, and we assume no responsibility or liability for the contents of this article.